Folder picture is the picture you see on a folder when it’s being viewed in the thumbnail view (tiles, medium icons, large icons and extra-large icons view). Typically, Windows will choose one of the first four listed in the folder. Or, it will just display a Windows default picture icon.
Sometimes, to recognize the folder easier, people opt for changing folder picture, which is possible not only in Windows 10, but also in other Windows version. The following are the image file types that can be set as a Windows 10 folder picture:
.jpg, .jpeg, .gif, .png, .tif, .tiff, .bmp, .ico, .wmf, .dib, .jfif, .jpe, .fpx, or .mix.
Especially, if you take a lot of photos, it can make finding the right collection easier with a visual cue. To change the folder picture in Windows 10, do the following.
Changing Folder Picture in Windows 10
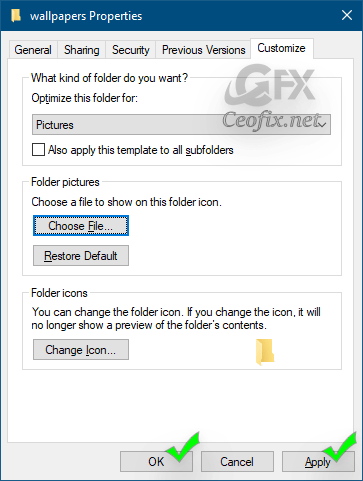
1- Open File Explorer and right-click on the folder you want to change the default picture and choose Properties from the context menu.
2- Then click the Customize tab and click the “Choose File” button.

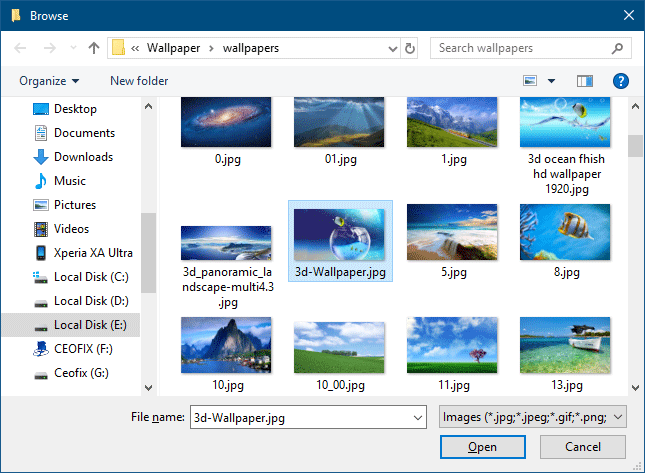
3- Browse to the picture file that you want to set as the folder picture for the selected folder, and then click the Open button.

4- Click Apply and OK and you should see the folder picture has changed. If you don’t see it right away, just refresh the folder.

To restore the original folder picture, click the Restore Default button.
That’s All…
Recommended For You
How To Batch Rename Multiple Files In Windows
How To Display Full Path Of Files And Folders İn Windows 10
Restore Previous Folder Windows At Logon In Windows
Published on: Apr 4, 2019- edited date: 29-08-2020
