In this article, we’re going to add any printers you like to the Context Menu “Send to” option to make printing easier.

The Send To option in the right-click context menu is very useful and versatile. Because it provides a convenient way to send a file to a specific folder, application or other item with the Windows ‘Send to’ menu. You can add a printer shortcut to the Send to context menu to send items you want printed to any printer(s) you add to the Send to context menu.
Adding a printer in the “Send to” menu allows you to send documents directly to the selected printer without having to open the file. Also, adding other printers on your network in the “Send To” menu gives you more flexibility in choosing your printer. To add a printer to the “send to” context option perform the following:
How to Add Any Printer to the “Send to” Context Menu in Windows
( You can watch the how to video which located at the end of the article)
1- Press the Win+R keyboard shortcut to open the Run box.
2- In the Empty field of the box, type “shell:PrinterFolder” and press Enter.
shell:PrintersFolder

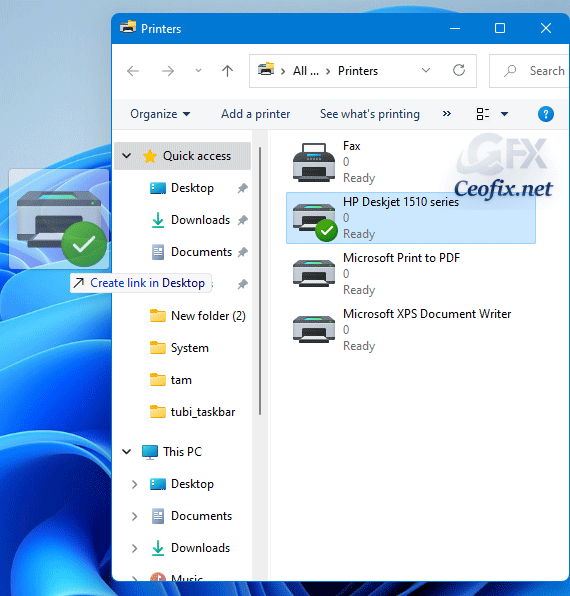
The above action opens the Printers folder. This folder contains all your printers. If you have several printers, locate the printer of your choice and drag it to the desktop.

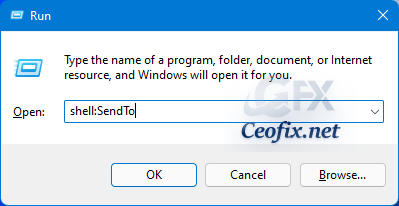
We now need to add the shortcut to the “Send to” folder. To open the Send To folder, press Win + R, type shell:SendTo and click the Ok button.
shell:SendTo

In the “Send To” folder, copy and paste the previously created print shortcut into the “Send To” folder. Close the folder when done.

And check the Send To Menu.

Recommended For You
Add Elevated Cmd to Desktop Context Menu (ceofix.net)
How to add Restart Start Menu Context Menu in Windows 10 (ceofix.net)
Add Open Command Window Here to Windows 10 Context Menu (ceofix.net)
2 Ways to Remove Map Network Drive From Context Menu (ceofix.net)
Disable Context Menu on Taskbar and Customization Options (ceofix.net)
Published on: Aug 17, 2021 – last edited: 20-07-2023
