Every cell in a spreadsheet starts at a standard width and height, However, you can easily change the height and width for one or more rows and columns.

Change Row Height in Microsoft Excel
1- Option one,
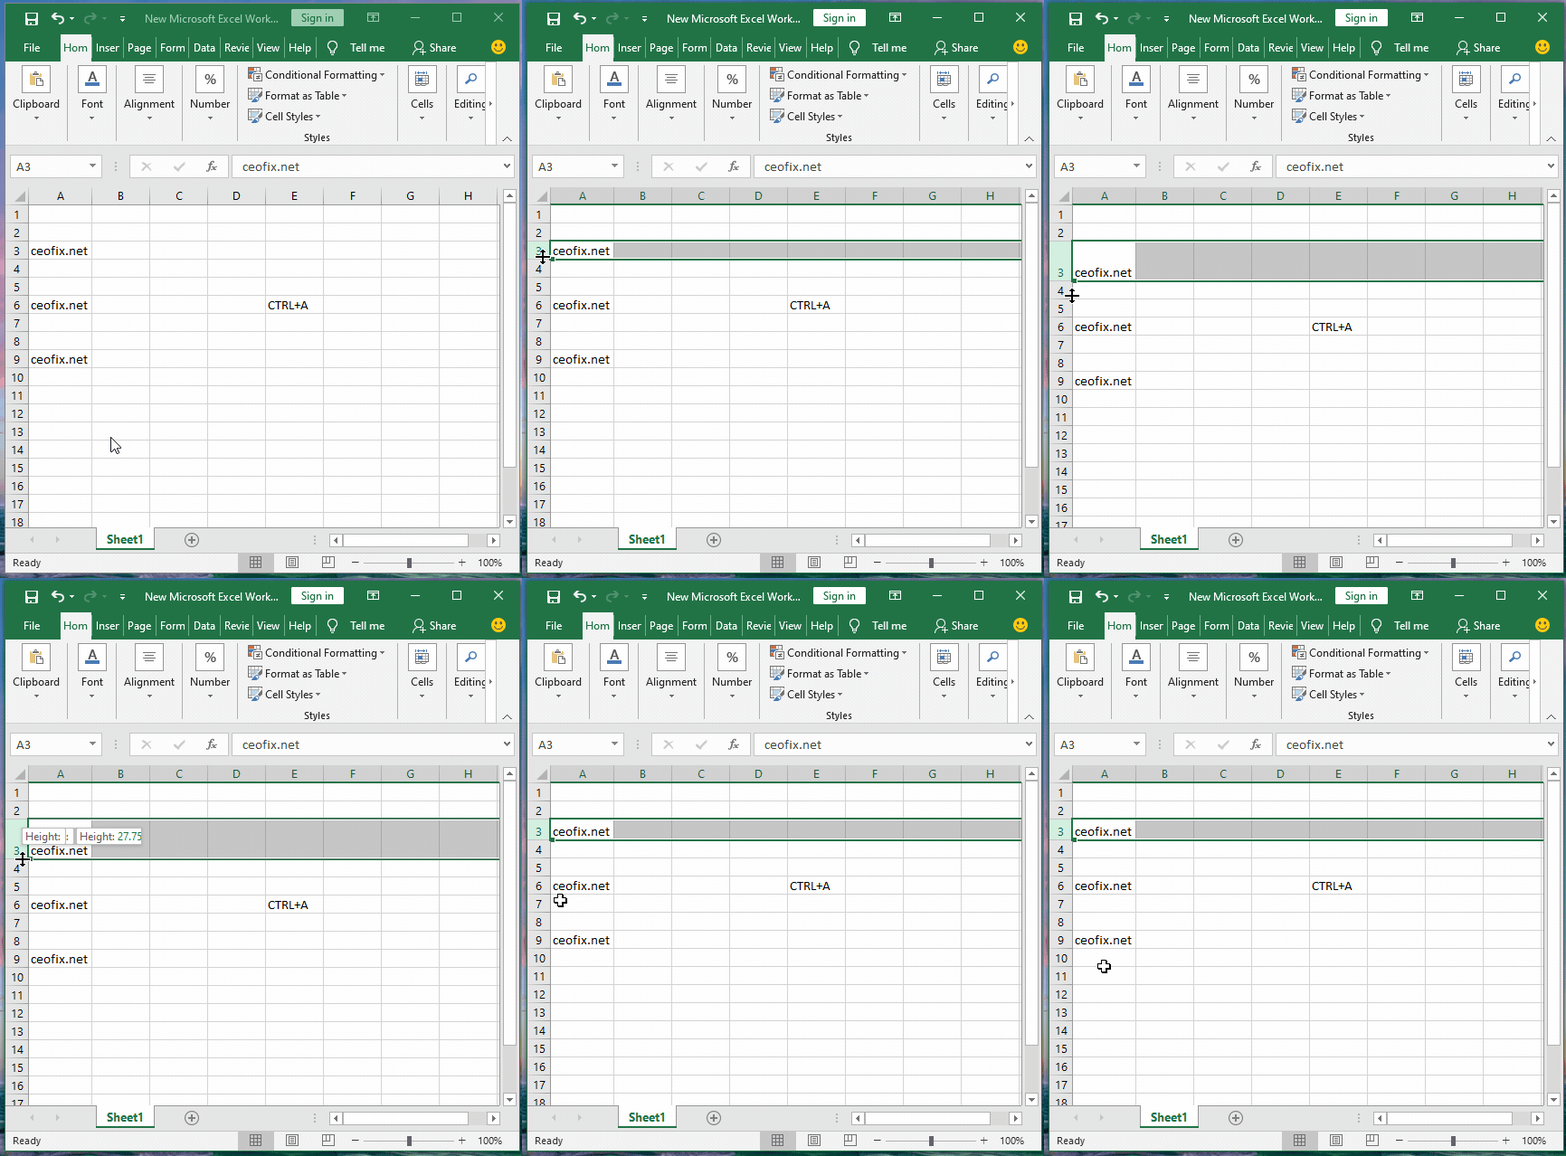
Position the mouse pointer on the bottom boundary of the row heading until it turns into a black double-sided arrow. This needs to be showing before clicking and dragging. Drag until the row is the height that you want.

To change the height of multiple row, select the rows of interest and drag the boundary below any row heading in the selection.

To change height of all rows on the sheet, select the entire sheet by pressing Ctrl + A or clicking the Select All button and then drag the row separator between any row headings.

2- Option two
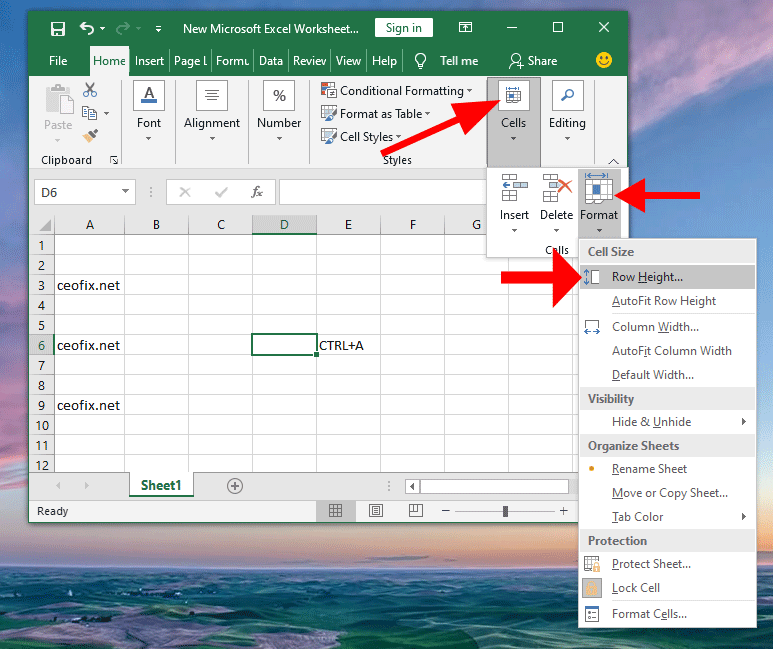
to set the Row Height to a specific value, select the row whose Height you wish to change, and then go to the Home tab in the Cells group and click Format.

In the drop-down list, select Row Height.

Enter the desired width, and press OK.
3- To do this for all columns
Select an area by clicking in one cell, and dragging the highlighted portion to span the entire height of the section you’d like to resize and then click home tab in the Cells group and click Format.
In the drop-down list, select column width. Enter the desired width, and press OK.
Alternatively
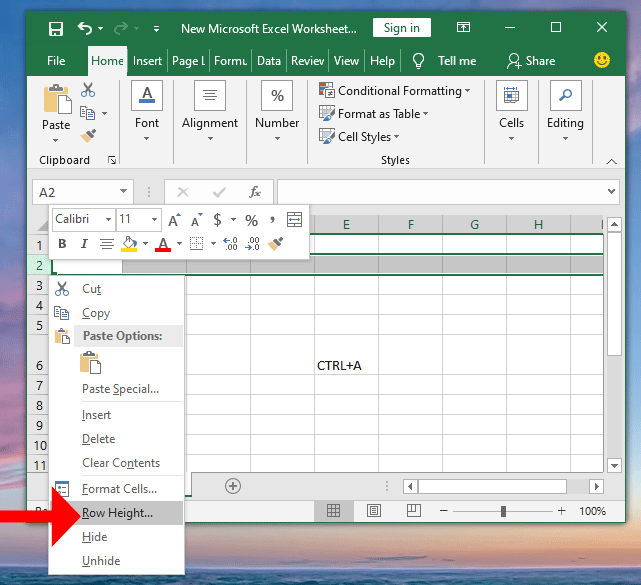
Right-click a row.
Select Row Height.

Enter a row height or column width, in pixels.

Click OK.
OK. That’s All.
