How to Quickly Transfer Photos from Microsoft’s Photos Companion to Windows 10 PC?
Photos Companion, it’s an Android (and iOS) app that lets you quickly transfer photos from your phone to the Photos app on a Windows 10 PC via WiFi. It works very well from my experience and might become my go-to way for sending screenshots to my computer.
The app works by temporarily linking (via QR code) to the Windows 10 photos app. You can send multiple photos over the same Wi-Fi network, and they appear immediately in the photos app.
How to Quickly Transfer Photos from iOS and Android to Windows 10 PC
1. Connect your phone and PC to the same Wi-Fi network.
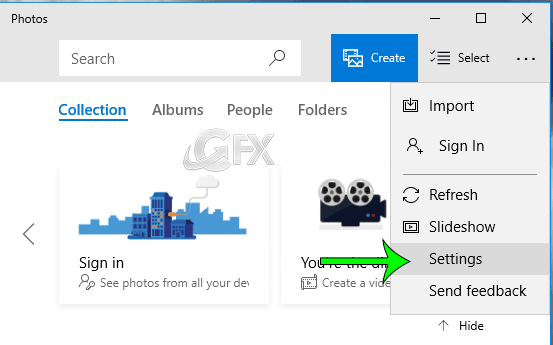
2- launch the Photos app on your Windows 10 PC and click on the three-dot menu button in the top-right. Select Settings.

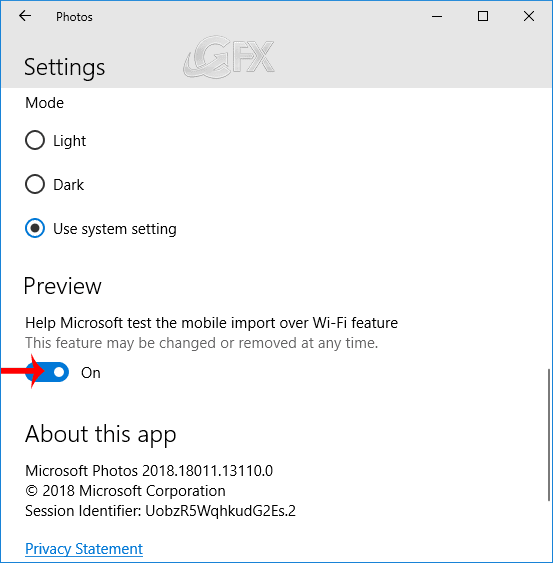
3- Scroll down and toggle on Help Microsoft test mobile import over Wifi.

4 . Restart the Photos app again, click on Import.
5. Select From mobile over Wi-Fi.

6- Photos Companion Launch the app on your phone and tap Send photos.
7. Point the scanner on the Photos Companion app at the QR code to begin the transfer.

5- Do that and you’ll be taken to a thumbnail grid of all images (photos, screenshots, downloads, etc) and videos on your device. You can multi-select the ones you want to send, then tap Done in the top left.
Recommended For You
How To Change Photoshop Splash Screen
