When you connect a new drive to your PC, Windows automatically assigns the next available letter after C. You can change these drive letters if you want to keep your computer systems organized a certain way.
Change Drive Letter via Disk Management ( A Difficult and Risky Method)
1- Open Disk Management. ( Press the Win + R keys to open Run, type diskmgmt.msc into Run, and click on OK to open Disk Management.
diskmgmt.msc

2-Right-click the drive and select the Drive Letter and Paths option.

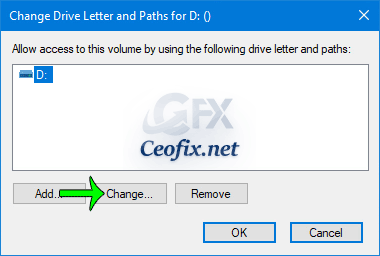
3- In the window that appears, click the Change button.

4- Select the Assign the following drive letter option. Use the drop-down menu to assign a new drive letter.

5- Click on Yes to confirm.

5- Click on again Yes to confirm.

That’s all. When finished, you can close Disk Management if you like.
How to Simply Change Drive Letters in Windows- Simple and Risk-Free Method
Changing drive letters With “driver change letter.exe” usually takes less than a few minutes, at most. Here’s how in Windows .

1- Download Drive Letter Changer from developer webpage (at the end of the page) and unzip it.
2- Then double click the “dChanger_x64.exe” or “dChanger.exe” file (depends on your systemarchitektur)
3- User Account Control (UAC) windows can popup and asks you if you want to allow it , Click Yes to proceed.
4- only click Right-click the drive and select the Change Drive Letter and Paths option.

5- If you want, you can change it with a letter in use, or you can change it with an empty letter. When we change the drive letter. a window opens.
6- For example do you want to replace drive letter E:\ with F:\

Wowww That’s all 🙂
Published on: Jun 2, 2020 -Last edited: 22-02-2024
