Windows lets you pause automatic updates for one week. Here’s how to do it.

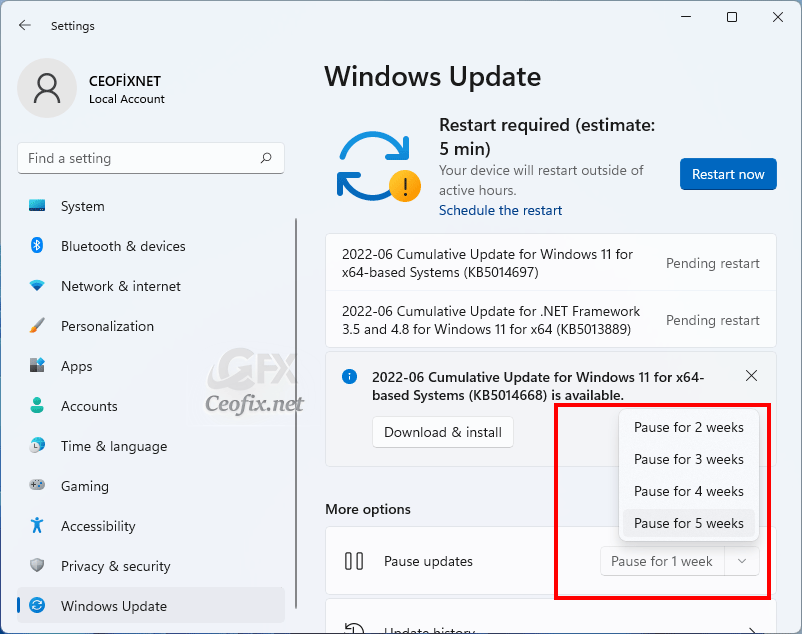
Like earlier versions, Windows 11 will check for updates automatically in the background. It will then try to restart your PC at a time when you’re not using it outside of Active Hours. But what if you don’t want to receive updates temporarily? Because at times it is required to pause the Windows 11 update for a while in order to finish some important projects and works. Windows 11 lets you pause updates for up to 5 weeks.
How to Pause and Resume Windows 11 Updates
First, open Windows Settings by pressing Windows+i on your keyboard. Or, you can right-click the Start button in your taskbar and select “Settings” in the menu that appears.
Click on Windows Update in the left sidebar. In the Windows Update screen, click on the “Pause for 1 week” button which will show you additional options.

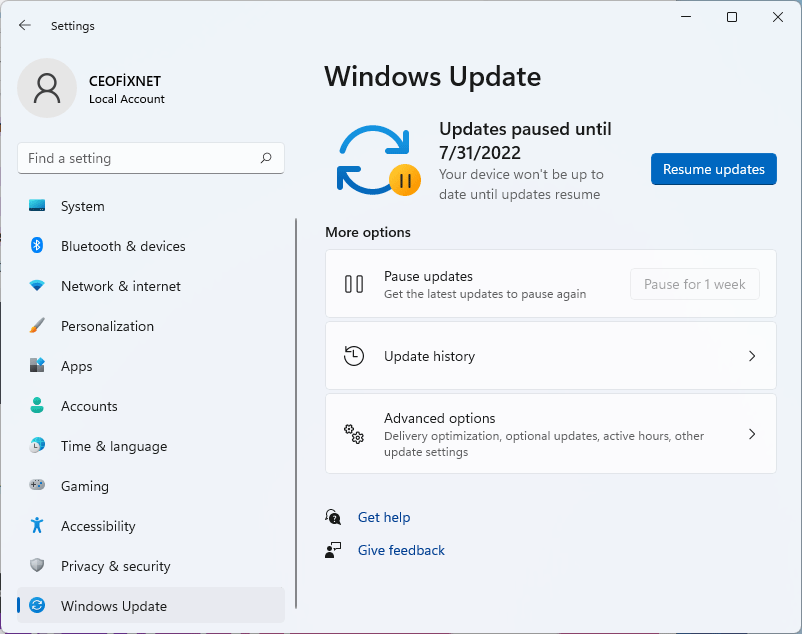
After clicking the button, you’ll see the following message letting you know that updates are paused. It will display the date (based on the number of weeks you choose) for when automatic updates will resume.
Turn Off Windows Update Service
Another easy way to cancel Windows 11 update is by turning off the Windows Update Service. You will have to turn the service back on manually when you are ready to install the updates in the future.
Resume Windows 11 Automatic Updates
Sometimes, you need to resume back your updates to keep track of the new features. In order to resume automatic windows 11 update, Start > Settings > Windows Update and click on the Resume Updates button.

When you resume updates, Windows 11 will check for any new updates that became available while you had it paused. If it finds any, you can install it immediately by clicking the “Install” or Download Now” button. The name of the button varies based on the type of update that’s available.

You can also schedule the update time

PS: Furthermore, you can always install updates manually from Windows Update and also from Microsoft Update Catalog.
Published on: Jul 4, 2022-Last edited: 19-02-2023
