Microsoft had previously offered feature to adjust the size and color of the standard mouse cursor. Another feature having to do with the mouse is in a text cursor indicator option. You can manage the size and color of text cursor indicator in windows 10.

How to Change Text Cursor Thickness, Indicator, and Color
Change the size of the cursor which useful if you’re giving presentations where other people have to follow the cursor on the screen, or if you have a visual impairment that makes it difficult to spot the cursor at its default size. here is how to do it
Press the Windows + I key combination to open the Settings app or Open Windows Settings either from the Start menu.
After Windows Settings open up, click on ‘Ease of Access’ . Then click on ‘Text cursor’ on the left.
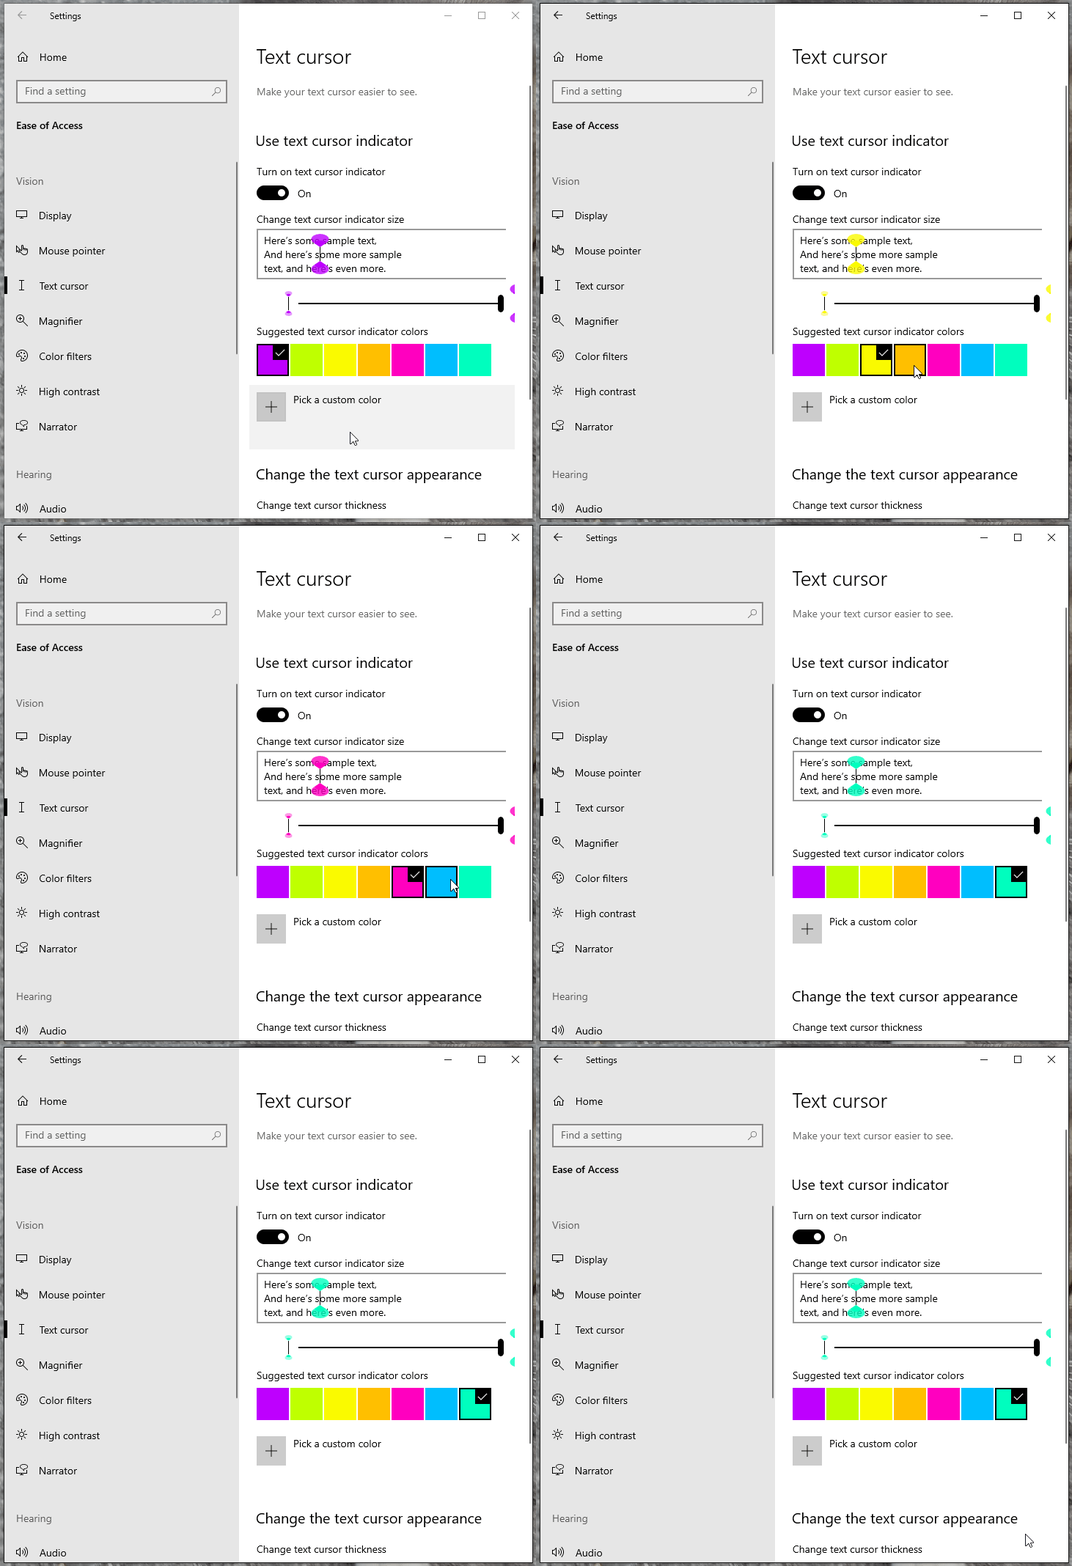
Toggle the “turn on text cursor indicator” option there to enable the feature.
Now, you can adjust the size of the indicator using the slider.

Additionally, you can change Change Text Cursor Color. Scroll down a little, and you can choose from the available seven colors.

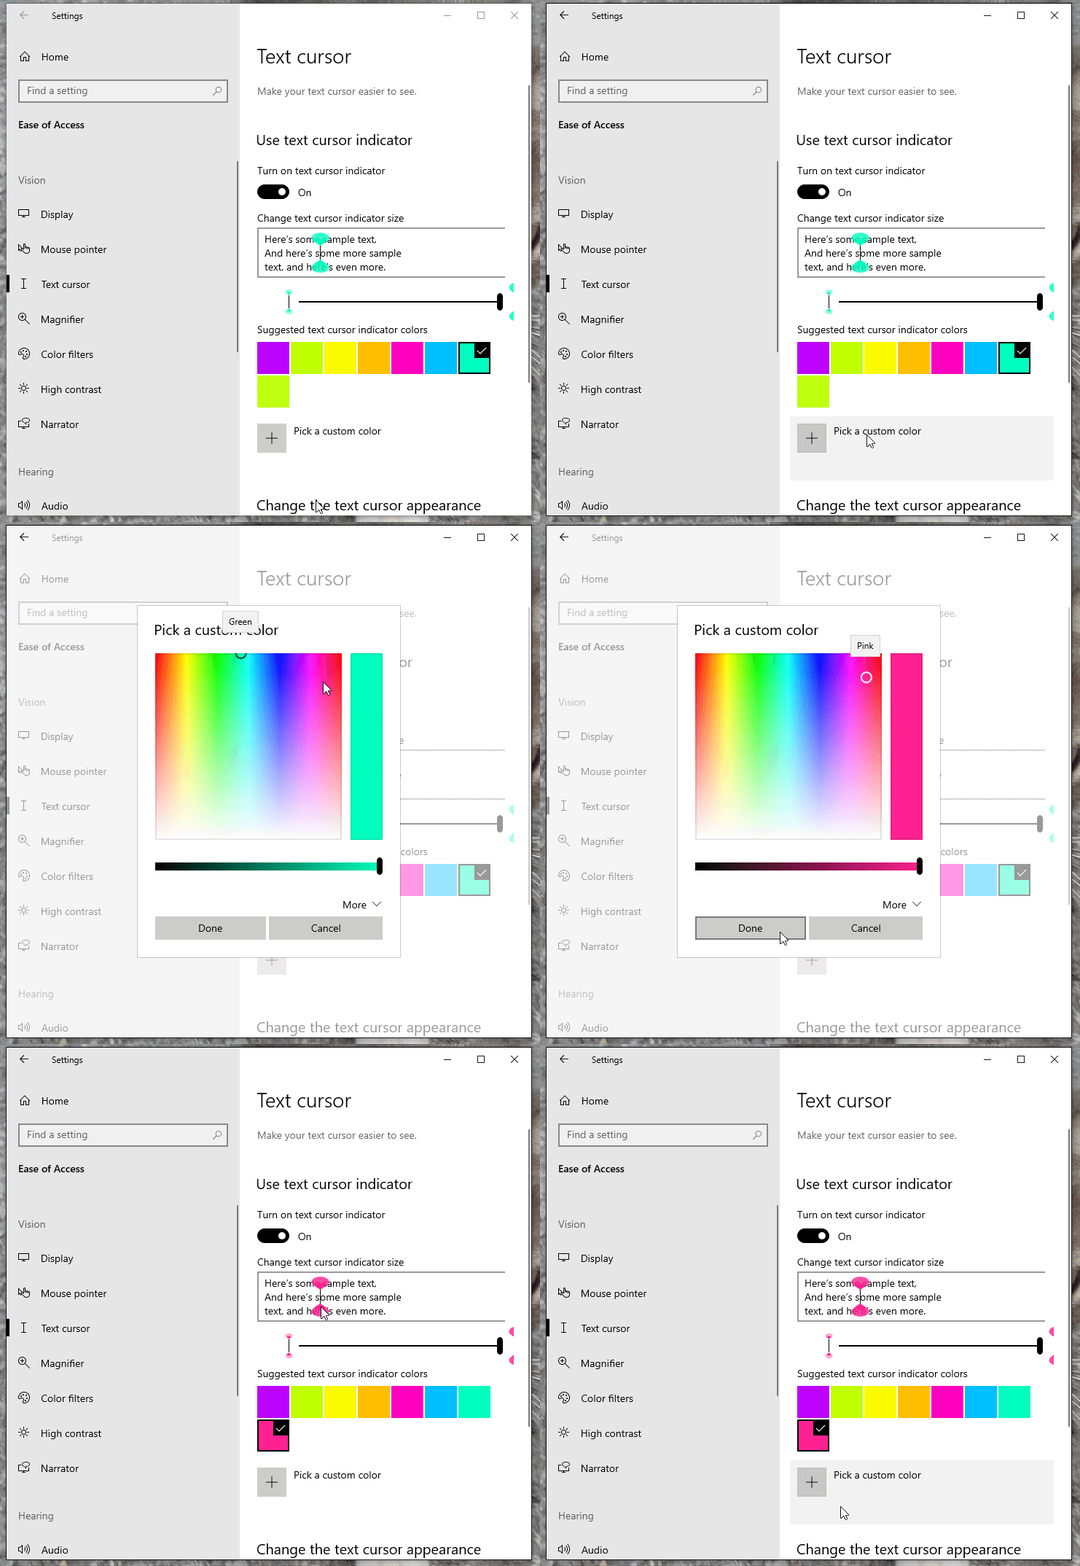
If you don’t like the default palette of colours to choose from, select Pick a custom pointer color, this will open up the colour picker for you to choose a completely custom colour.

When finished, you can close Settings if you like. Changes are highlighted automatically on the Settings page. I recommend that you check them out in a text editor or similar application to find out if the selection works out for you.
Change text cursor appearance
On the same Settings page, you’ll find a slider that lets you increase the thickness of your cursor thus making it easier to see. To adjust the cursor’s thickness, use the slider at the bottom of the page.

A setting somewhere around the middle of the slider will give you a squared block shape, reminiscent of the classic Windows Command Prompt box cursor.

Note: The ability to change the color of text cursor indicator is available starting with Windows 10 version 2020 ( 20H1) update and later.
Recommended For You
