Set an alarm on a your Windows 10 computer and don’t forget what you need to do!

Windows 10 has a built-in alarm clock application. If you spend a lot of time on your computer, Using your Windows 10 computer as an alarm clock can be extremely useful. Because, On Windows 10, you can set alarms for tasks, events, meetings, and just about anything else that would require an alert. So how to set Alarm in Windows 10 computer?
Steps to set alarm in Windows 10:
The Alarms & Clock app should be visible when the Start Menu opens, but scroll down a bit if it’s not. Click or tap on the app to open it. Alternatively, Type “alarm” into the Windows search box. Click the “Alarms & Clock” icon.

You can turn alarms that already exist on and off by clicking the toggle to their right.

To set a new alarm, click the plus (+) in the bottom-right corner.
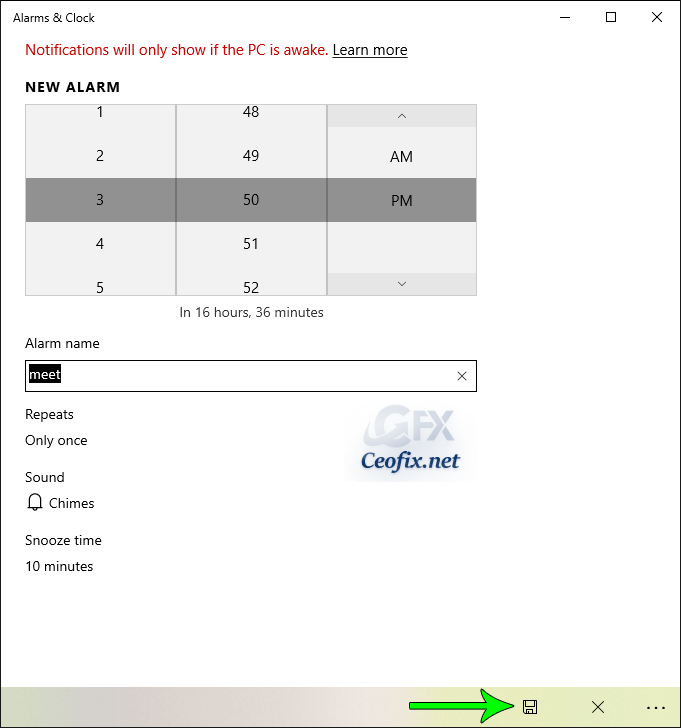
Use the scroll wheel to set a time. Set an alarm time. You can also set the alarm sound, snooze time, number of times the alarm repeats and the name of the alarm, but these are all optional settings.
At last, don’t forget to press “Save” button from the lower part of the window when you finish all the settings.

Keep in mind that this alarm will work only if your Windows 10 system is awake.
To stop your computer from sleeping:
Press the Win+I keyboard hotkeys.
From System Settings click on System (is the first entry) and from the left side of the main window choose the Power & sleep feature.

Set Sleep time to “Never” under “when plugged in” and / or “on battery.” If you do not let the computer go into sleep mode while using the battery, it may run out of charge.
Recommended For You
One-Click With The Taskbar Clock Display Seconds in Windows
How to Remove or Add the Clock from the Windows 10 Taskbar
