Network Reset is a feature in Windows 10. That can be used to easily reset network settings to fix network connection issues in windows 10. If you need to delete all of the network information on your Windows device, thanks to Network Reset feature, that’s faster to do than ever before. This article will teach you how to reset Network Settings In Windows.
Reset Quickly Networks Settings in Windows 11
( You can watch the how to video which located at the end of the article)
Go to the Start menu search bar, type in ‘settings,’ and select the Best match or (Windows Key + I is a shortcut).
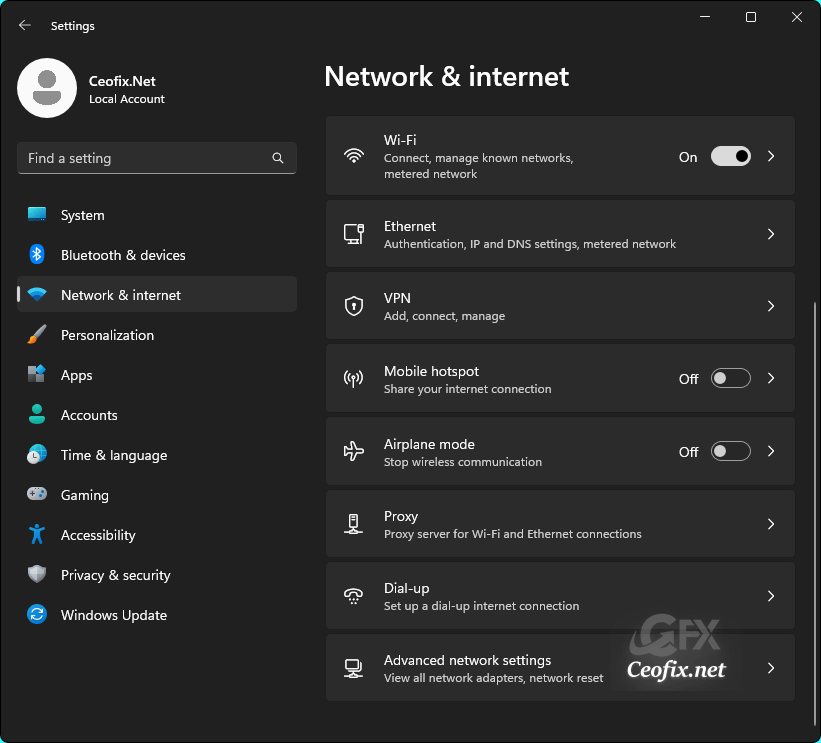
Select Network & Internet on the left sidebar.

Click Advanced network settings.

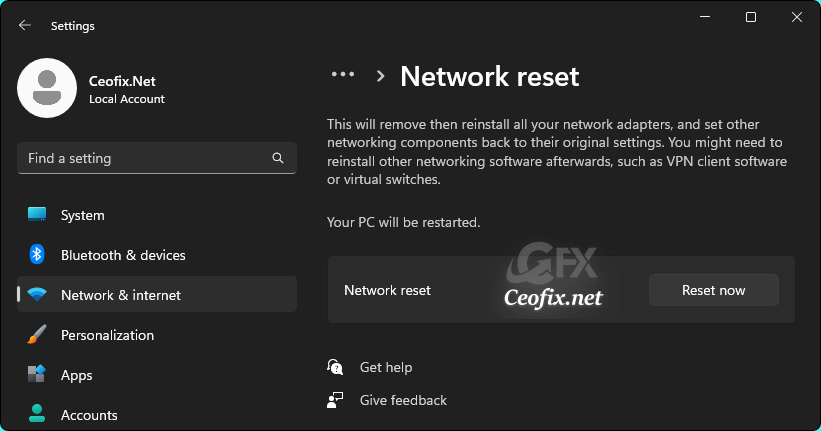
Under the More settings section in Advanced network settings, select Network reset.

Click on Reset now. A small window will ask if you are sure if you want to reset all the network settings. Select Yes.
After a few minutes, Windows 11 will reboot and all your network adapters will be reset to their factory settings.
How to Reset Quickly Networks Settings in Windows 10
1- Open the Settings app (Windows Key + I is a shortcut).
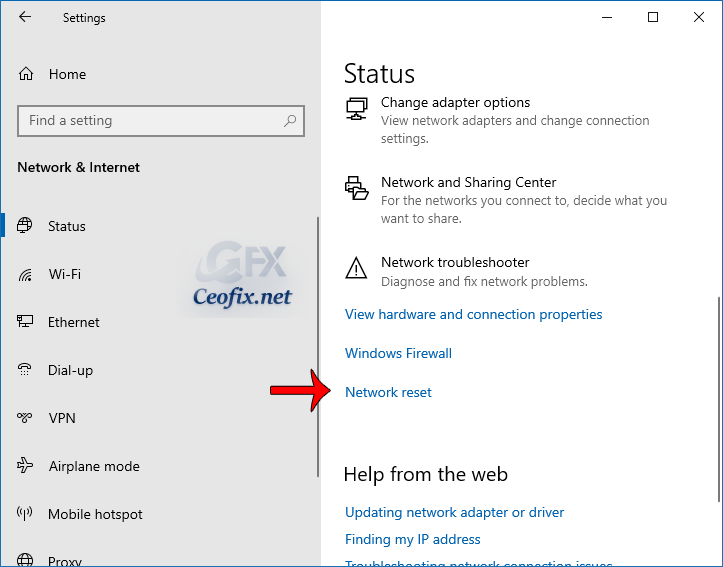
2- Select Network & Internet on the left sidebar.

3- On the “Network & Internet” page, select the “Status” tab on the left and then, on the right, scroll down. Click the Network Reset link.

4- Review the Network Reset information message. When you’re prepared to network your reset settings, select Reset now.

5- Select Yes in the network reset confirmation window. This will initiate the reset process and restart your computer.

Notes:
1- When the reset is complete, your computer will restart. When the computer restarts, you’ll notice that your network connection isn’t active. Just select the network icon, pick the network you want to reconnect to, and choose Connect.
2- This method Not only does it restore settings to default, but it also reinstalls the network adapter.
3- If you use a proxy or a VPN, you must reconfigure them also.
Published on: Oct 8, 2020-Last edited :27-08-2023
