Change or rename Active Network Profile

Windows automatically creates a network profile when you connect to a network. You can check the network profile name by clicking on the Network icon in Taskbar system tray area.
Some users may dislike the non-descriptive nature of wired network connections on Windows. However, that it is possible to rename network profile names to make them more descriptive on the operating system.
How to change or rename Active Network Profile Name in Windows?
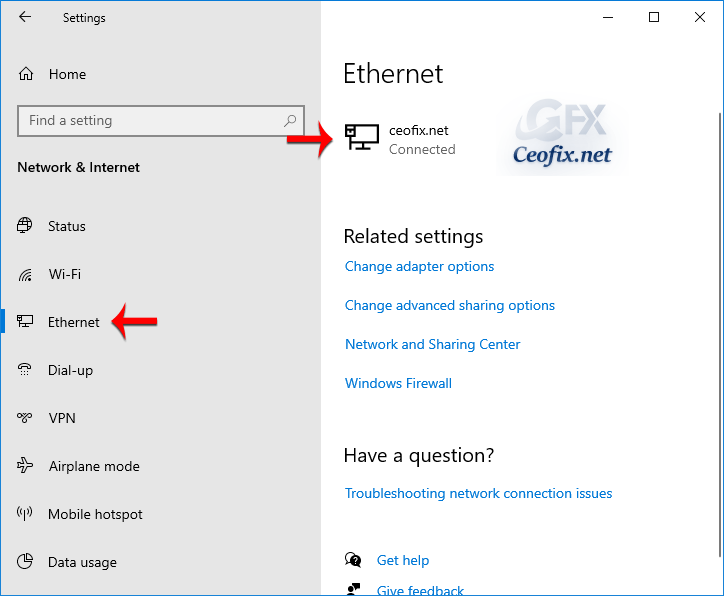
You can check the current name in the Network and Sharing Center on Windows or in the Settings application on Windows 10.
Click on Windows + I to open the Settings application.
Go to Network & Internet –> Ethernet depending on the connection type.

Alternatively, you can also find the network name from the control panel. To do that, search for “Control Panel” in the start menu and open it. Now, go to “Networking and Sharing Center.” You will see the network name in bold letters under the “View your active networks” section.

Today we will show you how to change or rename the network profile names in Windows. Here’s how to do it.
The first method is using Registry Editor and the second one is using a portable freeware Application
Change Network Name in Windows via Registry Editor
1- Open Registry Editor. You can do that by pressing Windows Key + R and typing regedit and clicking OK.
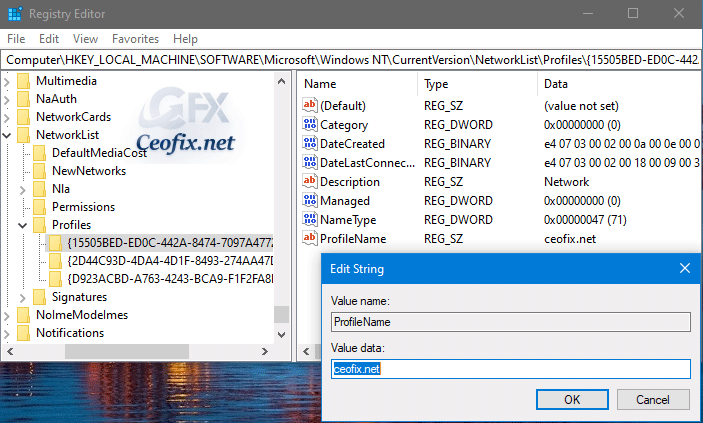
2- Windows users can simply copy and paste the below path in the registry editor’s address bar and then press Enter to go to the target key.
HKEY_LOCAL_MACHINE\SOFTWARE\Microsoft\Windows NT\CurrentVersion\NetworkList\Profiles

3- Click the little arrow to the left of the “Profiles” subkey to expand it and view its contents. Each folder represents a network connection in your system. you see several different GUIDs then you will have to click on each one of them and select the ProfileName string value.
Double-click on ProfileName once you have found the right entry and type the new name of the network that you want used on the device. After changing the value, close Registry Editor and check network name.
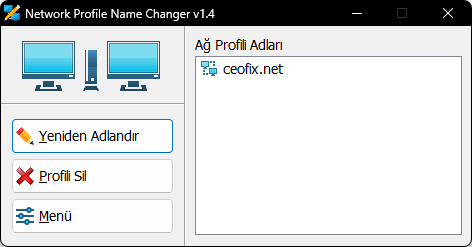
You can easily change the name of a certain network by performing via Network Profile Name changer Portable freeware . Here’s exactly what you need to do:
1- Download Network Profile Name changer from developer webpage (at the end of the page) and unzip it.
2- Then double click the “Network Profile Name changer.exe” file. Confirm the User Account Control dialog if prompted.
On the Main GUI , Type the new name in the box and click the “Apply now” button.

You can also see the changed network name in the control panel’s networking and sharing center.

I have searched this alot and finally find a very practical solution , Thank you
@Tim Mc Gregor
You’re Welcome